
Removing window tint can be a tricky task, but with the right approach, it becomes a manageable process. Whether you’re using a steamer to break down the adhesive or a mix of soapy water and ammonia to soften it, the key is patience. If you rush, you might leave behind residue on the glass or, worse, damage it.
When dealing with stubborn tint, taking your time and working patiently is essential. If it gets too tough, consider seeking professional assistance—it’s often the better choice rather than struggling through the messy aftermath of a bad installation.
Many vehicles come with high-quality window film, offering benefits like blocking UV rays, increasing privacy for passengers, and giving windows a sleek look. But over time, tinting may need replacement.
Whether due to low-quality film or the need for an advance to something newer and more innovative, removal can feel like a hassle. You can try the DIY method, but sometimes it’s better to trust The TintZen or another professional for the best way to handle the job.
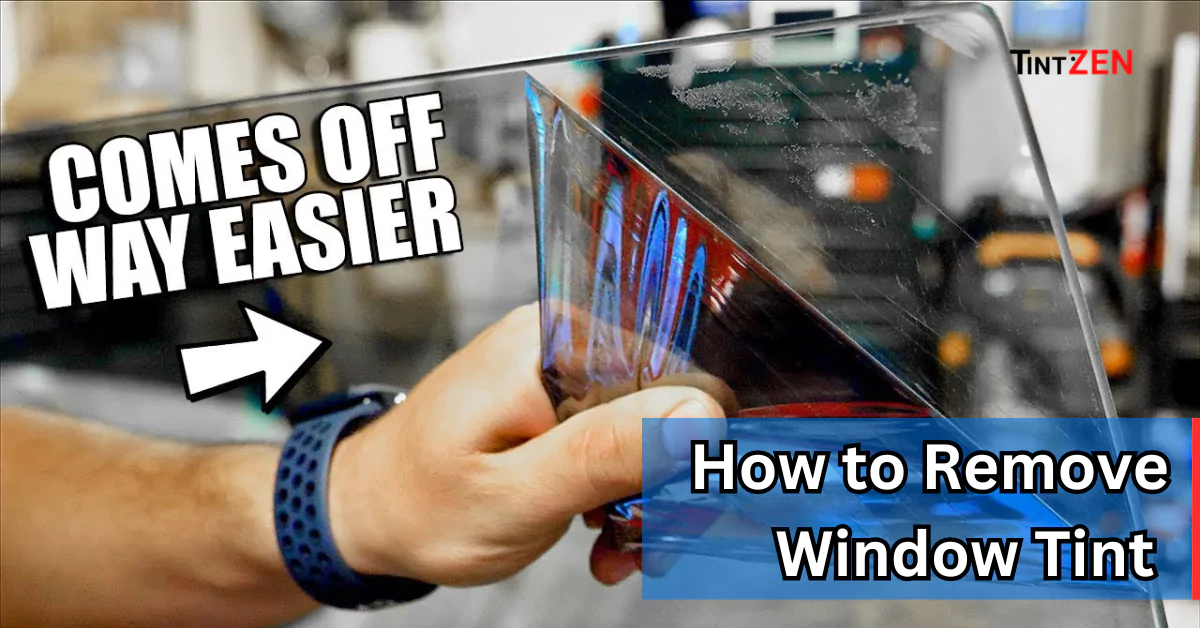
How to Remove Window Tint
Step 1: Prepare the Window
Start by rolling down the window slightly to create a small gap. This allows better access to the edges, making it easier to peel the film off without a hassle. A simple yet effective trick that ensures a clean and successful removal.
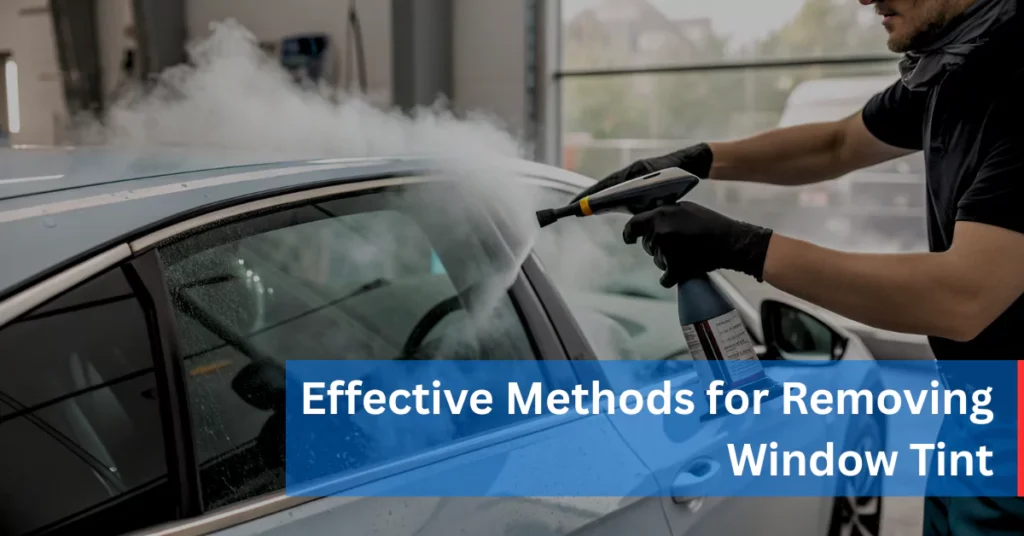
Step 2: Use a Steamer for Easy Removal
For a smooth window tint removal, start by applying heat using a professional steamer or a clothing one—it will work just as well. This step makes the tint pliable, helping to loosen the adhesive so it lifts smoothly without damaging the glass.
Step 3: Carefully Peel the Tint
Use a razor blade to carefully grab a corner of the film and begin peeling it back. Take your time and move slowly with caution to avoid damage. This gradual process gives you more control, ensuring the best results.
Step 4: Pull the Tint Evenly
Once you get a grip on the film, pull it evenly to prevent tearing. Move with patience and care while keeping an eye on the defroster. A mindful approach will help you successfully remove the tint without any mishaps.
Step 5: Remove Glue Residue
After the tint is gone, some glue residue may remain. Use an adhesive remover and a scraper or a cloth soaked in the solution to wipe the surface free of any sticky spots. Gentle motions will ensure a thorough clean, leaving the window clear and looking as good as new.
Effective Methods for Removing Old Window Tint
Heat Gun or Hair Dryer Technique
To remove window tint, start by gathering the necessary supplies: a hair dryer or heat gun, a razor blade, a cleaning solution, and a clean cloth. Warm up the tint using the heat gun or hair dryer, making the adhesive easier to peel off.
Carefully lift one corner with the razor blade and slowly pull, being careful not to cause damage to the window. Once the tint is removed, clean the window thoroughly, ensuring no remaining adhesive is left. If the tint has multiple layers, repeat the process for complete removal.
Lifting and Peeling the Tint Film
Once the top edge curls away, use a scraper to gently peel away the tint. Work slowly, removing a little at a time. Avoid the rush, as this part of the removal process can end in damaging the car or accidentally cutting yourself.
Ammonia and Soap Solution Method
Want a simple way to remove window tint? Try an ammonia solution! Just mix ammonia, soap, and water, then spray it on the tint. Cover with plastic wrap and let it soak for a few hours. Once softened, use a razor blade to gently peel off the tint.
Got stubborn adhesive? Soapy water will do the trick! Be careful to avoid damage and enjoy a clean, tint-free window.
Heating the Tint Film for Easier Removal
The tint film sticks to your car windows with an adhesive layer, so softening it is the first step. A fabric steamer or heat gun works best, but a hair dryer on high can do the job just expect it to take longer.
Roll down the window a few inches, hold the heat source a few inches away, and apply heat for a few minutes. Once you see the edges start to curl, you’re ready for the next step!
Razor Blade Scraping Method
If using just a razor blade, start by gathering the necessary materials, including a soft cloth. Begin at a corner, using the razor blade to lift the film. Slowly and carefully pull the tint film in a horizontal direction.
After the film is removed, use a cleaner to get rid of any leftover adhesive residue. Repeat these steps for all windows that need to be removed.
Removing Adhesive Residue
After the tint is peeled off, the car is likely to have a lot of leftover adhesive residue. To get rid of it, use an adhesive remover, such as isopropyl alcohol, nail polish remover, or soapy water. If in a pinch, soapy water may work but requires a little more scrubbing.
Final Window Cleaning
The final step of the removal process is to clean the window once you’re done. This includes wiping any remains after you’ve used the remover itself.
DIY vs Professional Window Tint Removal – Which One is Right for You?
Removing window tint is not as simple as peeling off a sticker. It requires time, effort, and caution. Should you go the DIY route or hire a professional? Here’s a quick comparison to help you decide.
| DIY Window Tint Removal | Professional Window Tint Removal |
|---|---|
| ✔️ Ideal for those with experience and patience | ✔️ Saves time and avoids the hassle |
| ✔️ Can save money, but takes more time | ✔️ Can save money, but takes more time |
| ❌ Risk of damaging the glass if not done properly | ✔️ Some shops offer discounted rates if you’re upgrading to new film |
| ❌ Requires razor blades, steamers, and adhesive removers | ✔️ Licensed and insured professionals ensure protection |
🛠️ Risk Factor: DIY can lead to scratches or cracks in the windshield, side, or rear glass, which may cost several hundred dollars to fix.
⚠️ Safety First: Removing tint involves sharp blades, dust, and debris. Always wear gloves, a facemask, and protective glasses.
🔍 Choosing a Professional: Research companies, read reviews, get a quote, and check if they are licensed and insured.
Final Tip: If you want a hassle-free, safe, and efficient solution, hiring a professional window tint removal service is the best option! 🚗💨
Final Thoughts
Removing window tint from a car can be easy if done carefully with the right tools and steps. Using a steamer, razor blade, or ammonia solution helps peel off the film and remove residue without damaging the windows.
If the process seems difficult or time-consuming, a professional service with the right expertise and equipment can make it safe and efficient while saving time and effort.